Timely Tactics | Calendar, Classes, Booking buttons and more
We’ve put together five great tips to help you make the most of your Timely account, calendar sidebar, taking attendance in classes, options for your Book now buttons and more!
1. Creative ways to use the Calendar sidebar
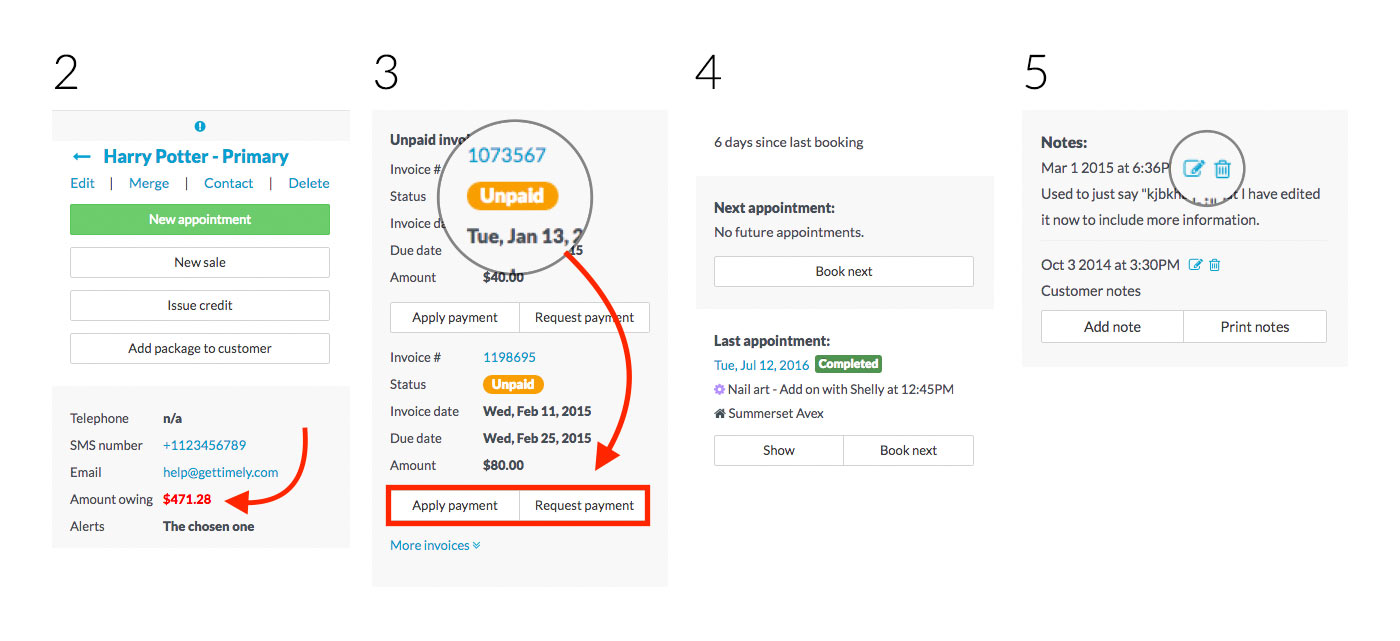
You’ve got all your important customer information you could ever need in a bar to the left, your Calendar sidebar! It’s packed full of handy customer information and quick access to anything you want to do with a customer’s profile. Perfect for when you need something in a pinch or want to refresh on a customer before they walk through the door.
Where’s the sidebar?
Click the [>] button to the top left of your Calendar, and/or hit the [space] bar to toggle the sidebar on and off.

Here are just a few of things you can do:
- Raise a sale for a product or package, or issue customer credit
- View a customer’s outstanding balance
- You can then scroll down to the Unpaid invoices section, to quickly Apply payment or Request payment for an overdue invoice.
- Check out how long it has been since the customer’s last appointment and use the Book next button to book their next appointment.
- Quickly View, Edit, Delete or Add notes in the customer’s record
2. Taking attendance for classes in Timely
Need to keep track of who is and isn’t showing up for their classes?
Say goodbye to your paper roll call, and hello to simple attendance tracking:
- Head to the Calendar
- Click on the Class
- Go to the Attendance tab
- Mark customers as Attended or Did not show
- Click Save to apply
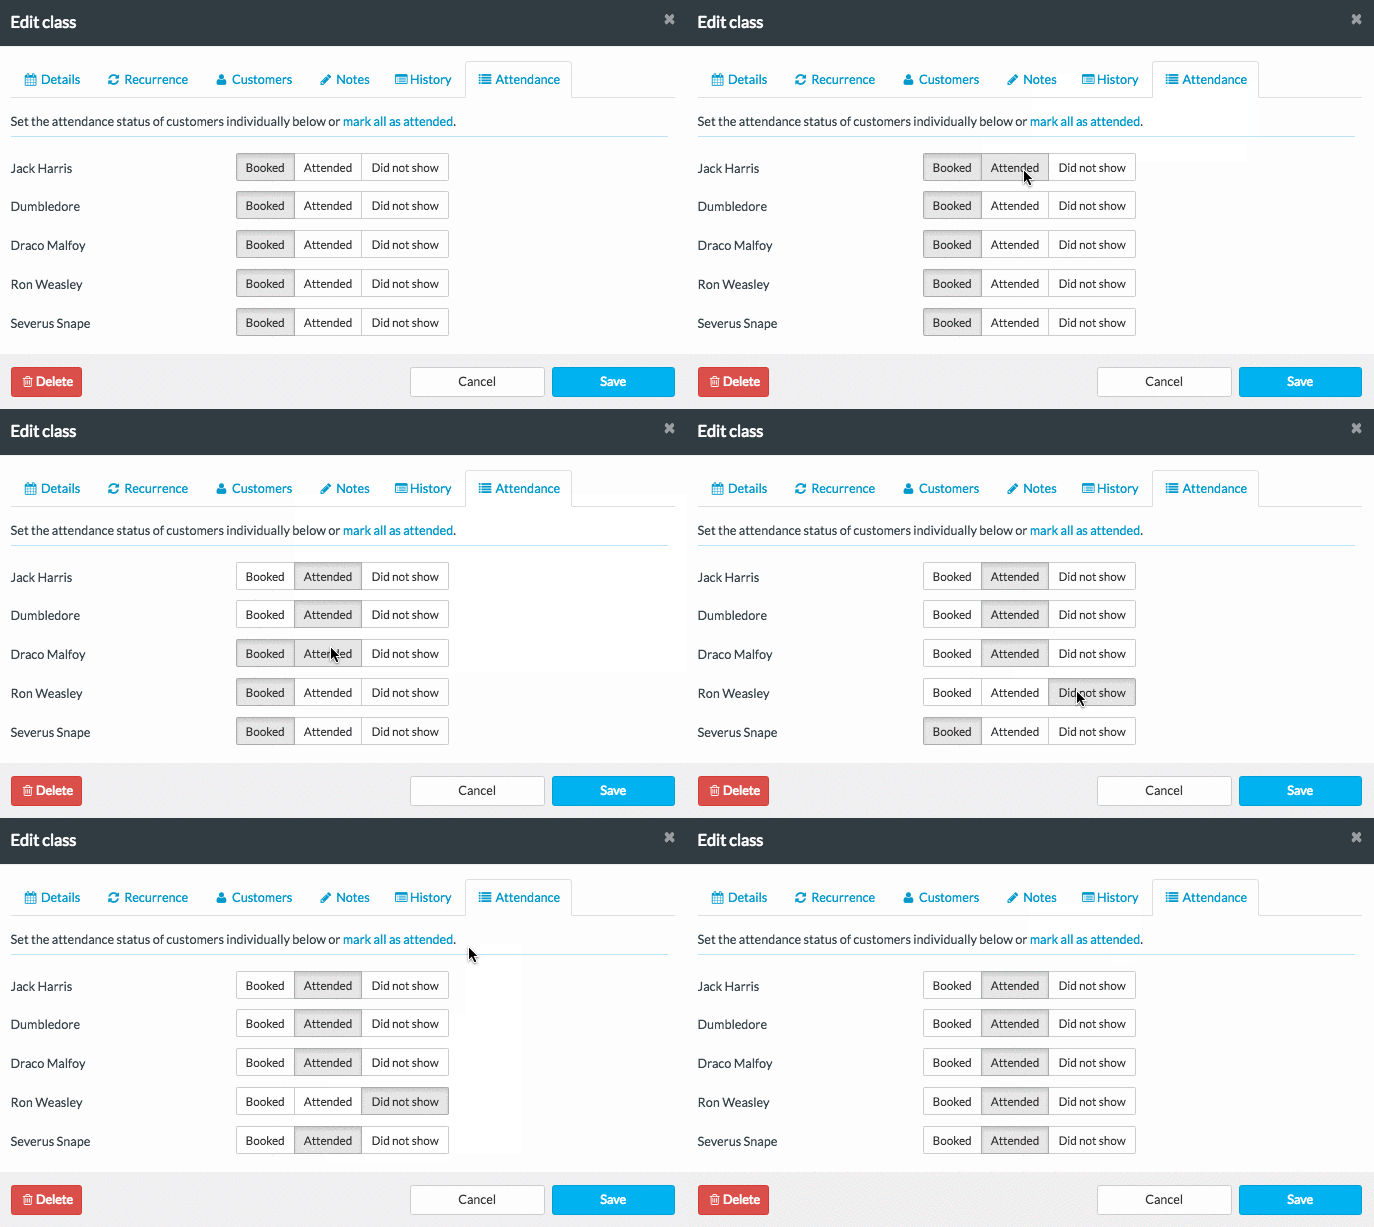
Top tip: Everyone present? Click the Mark all as attended link to er, mark everyone as attended!
3. Updating staff hours from the Calendar
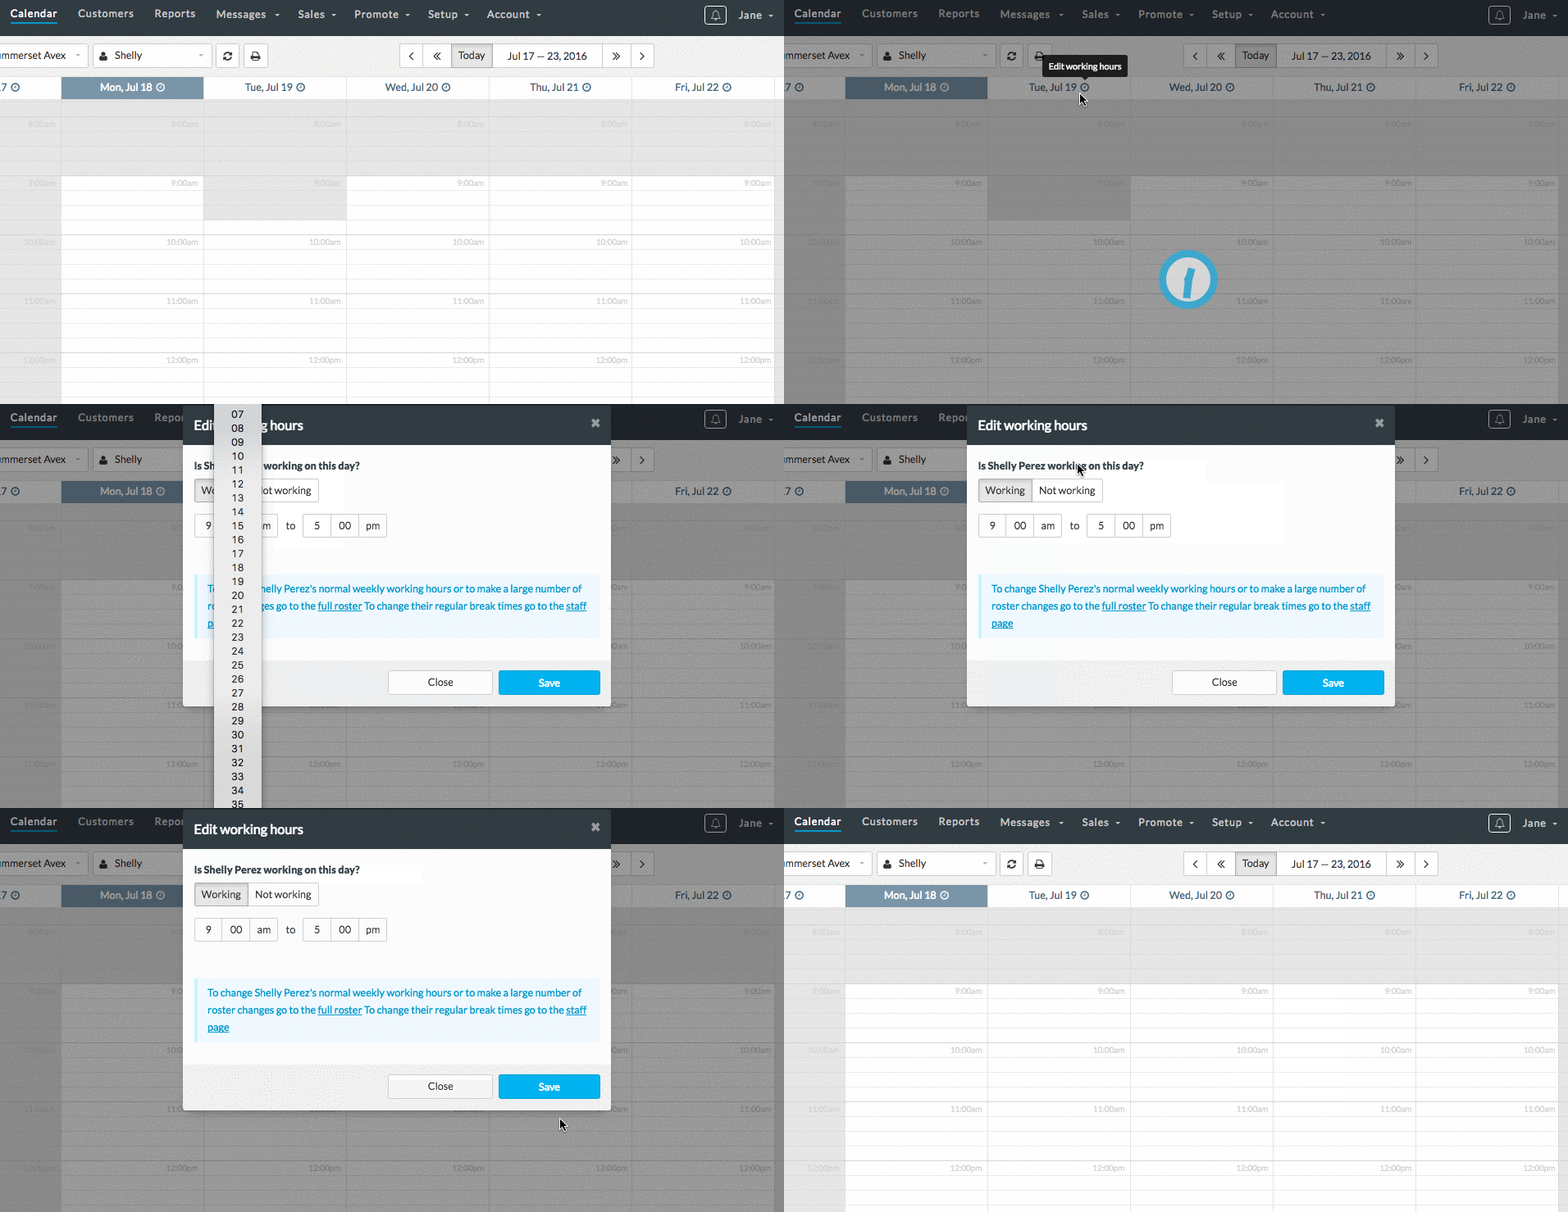
Want to quickly update a staff member’s hours for that day, without leaving the calendar? Easy peasy!
Just click the clock icon next to their name/date to update their Start and End time, and/or quickly toggle them on/off for the day.
4. Checking your bookable hours using the Staff timesheet report
As our buddy Ben Franklin said, “Time is money,” and in the service business, this couldn’t be truer! If you need an easy way to see if you’re banking all your hours, then we’ve got the report for you.
If you pop over to the Reports tab and run the Staff timesheet report, you’ll be able to see what percentage of your staff member’s working hours are booked:
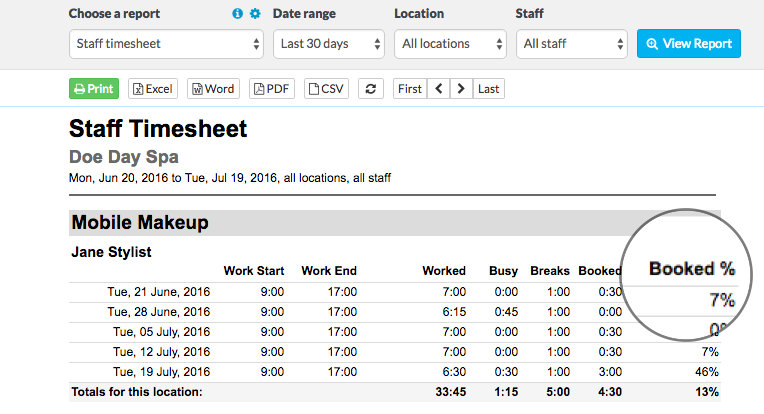
You’ve also got the option to include or exclude both Busy time and Breaks in the final Booked percentage.
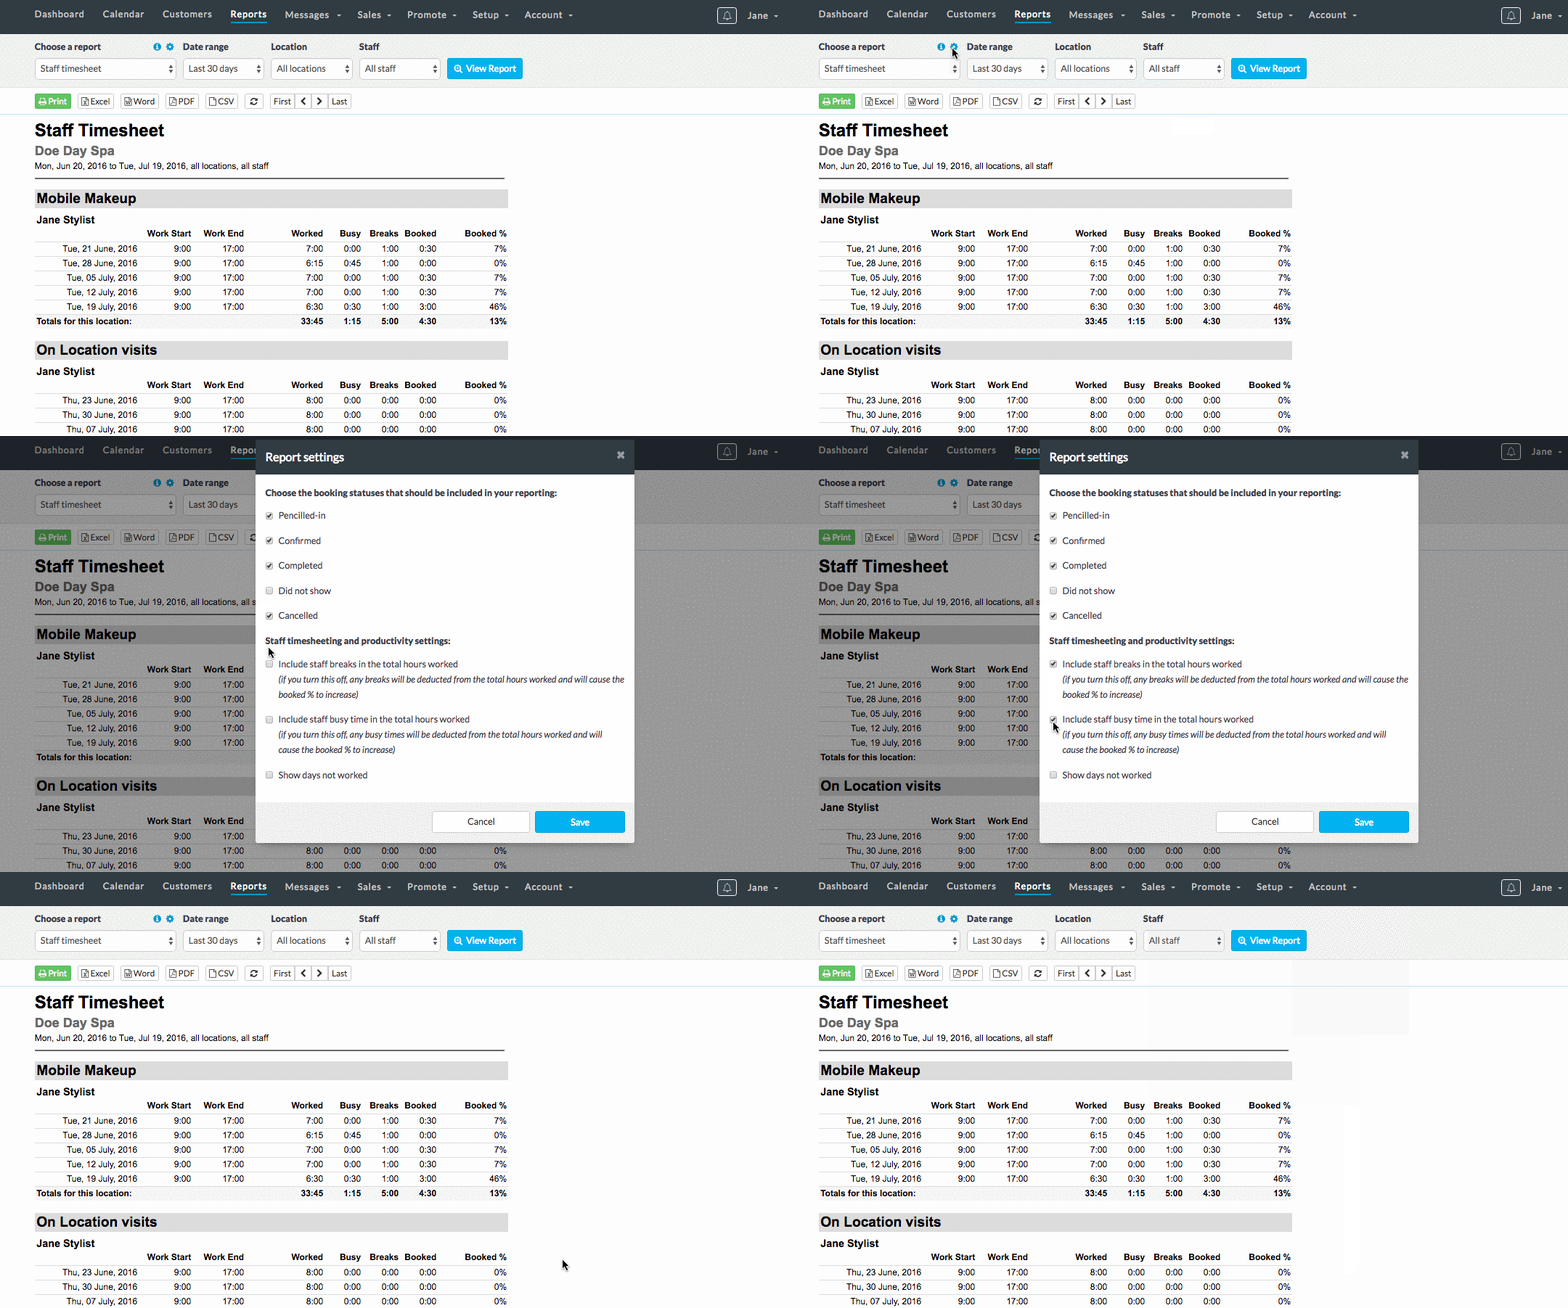
To update the settings, click the reports settings cog next to the Choose a report drop down and update the settings in the Staff timesheet and productivity settings section.
Remember to hit Save to apply any changes!
5. Creating booking buttons for a specific service, staff member or location
Got a special service price you’d like to share with some of your VIP clients? Want to add a book now button for a specific staff member to their profile on your website? Or, separate your online booking between two categories? Yup, you can do all that.
Head to Promote > Booking buttons to get started.
At the top of the page, you have the option to select which Location, Staff, Category and/or Service you’d like to create a button, link or widget for.
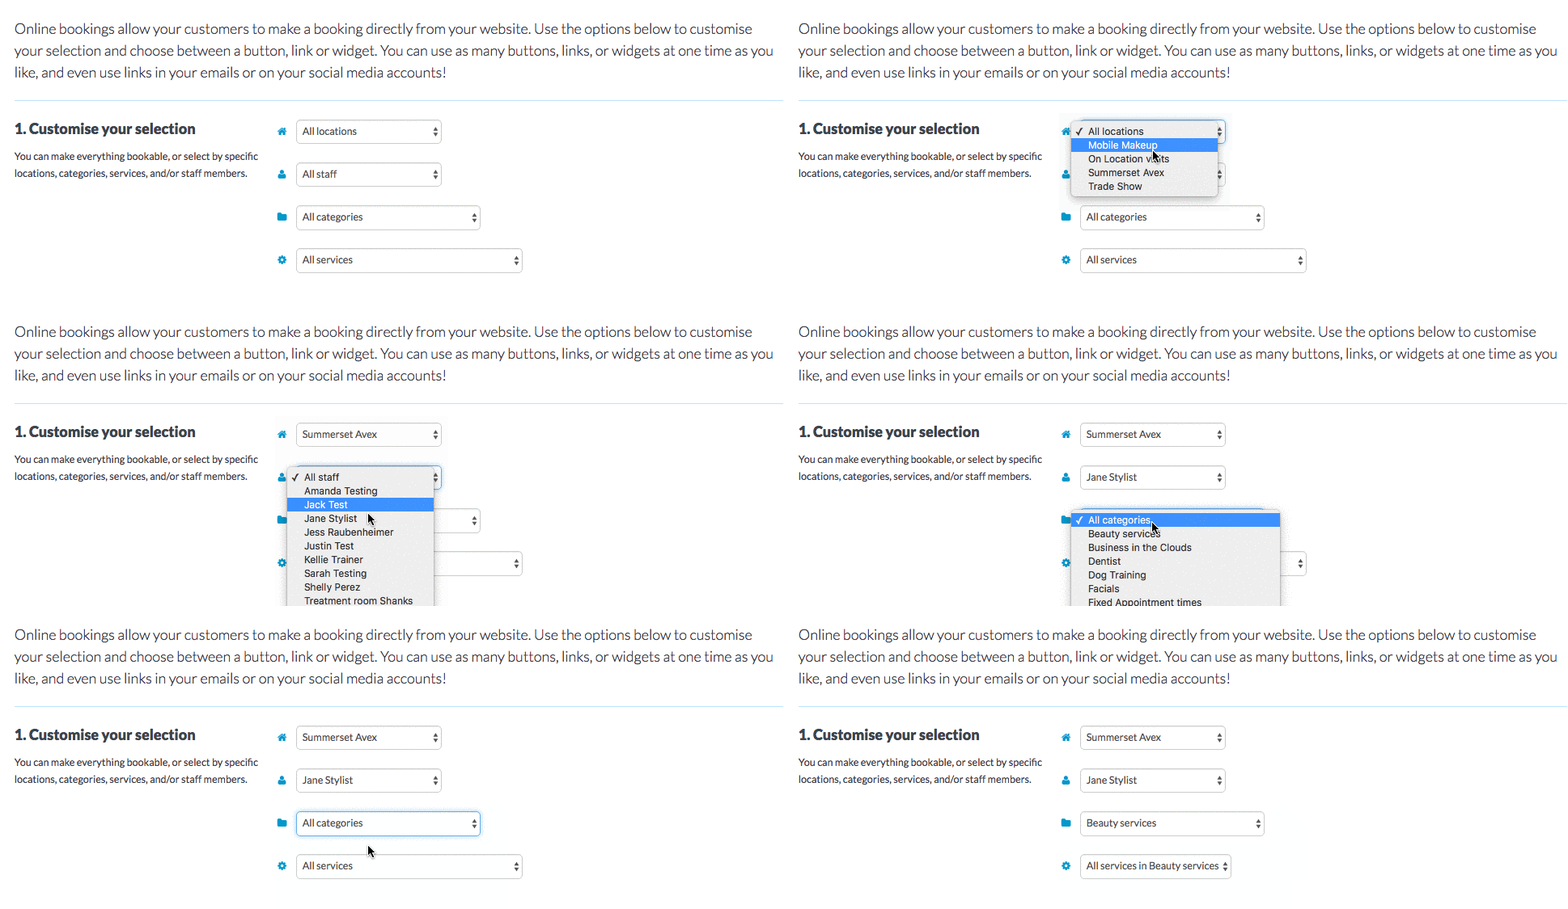
Then when the customer clicks on that specific link or button, those criteria will already be selected, making the entire booking process even easier.


